

Hardware for This Tutorial
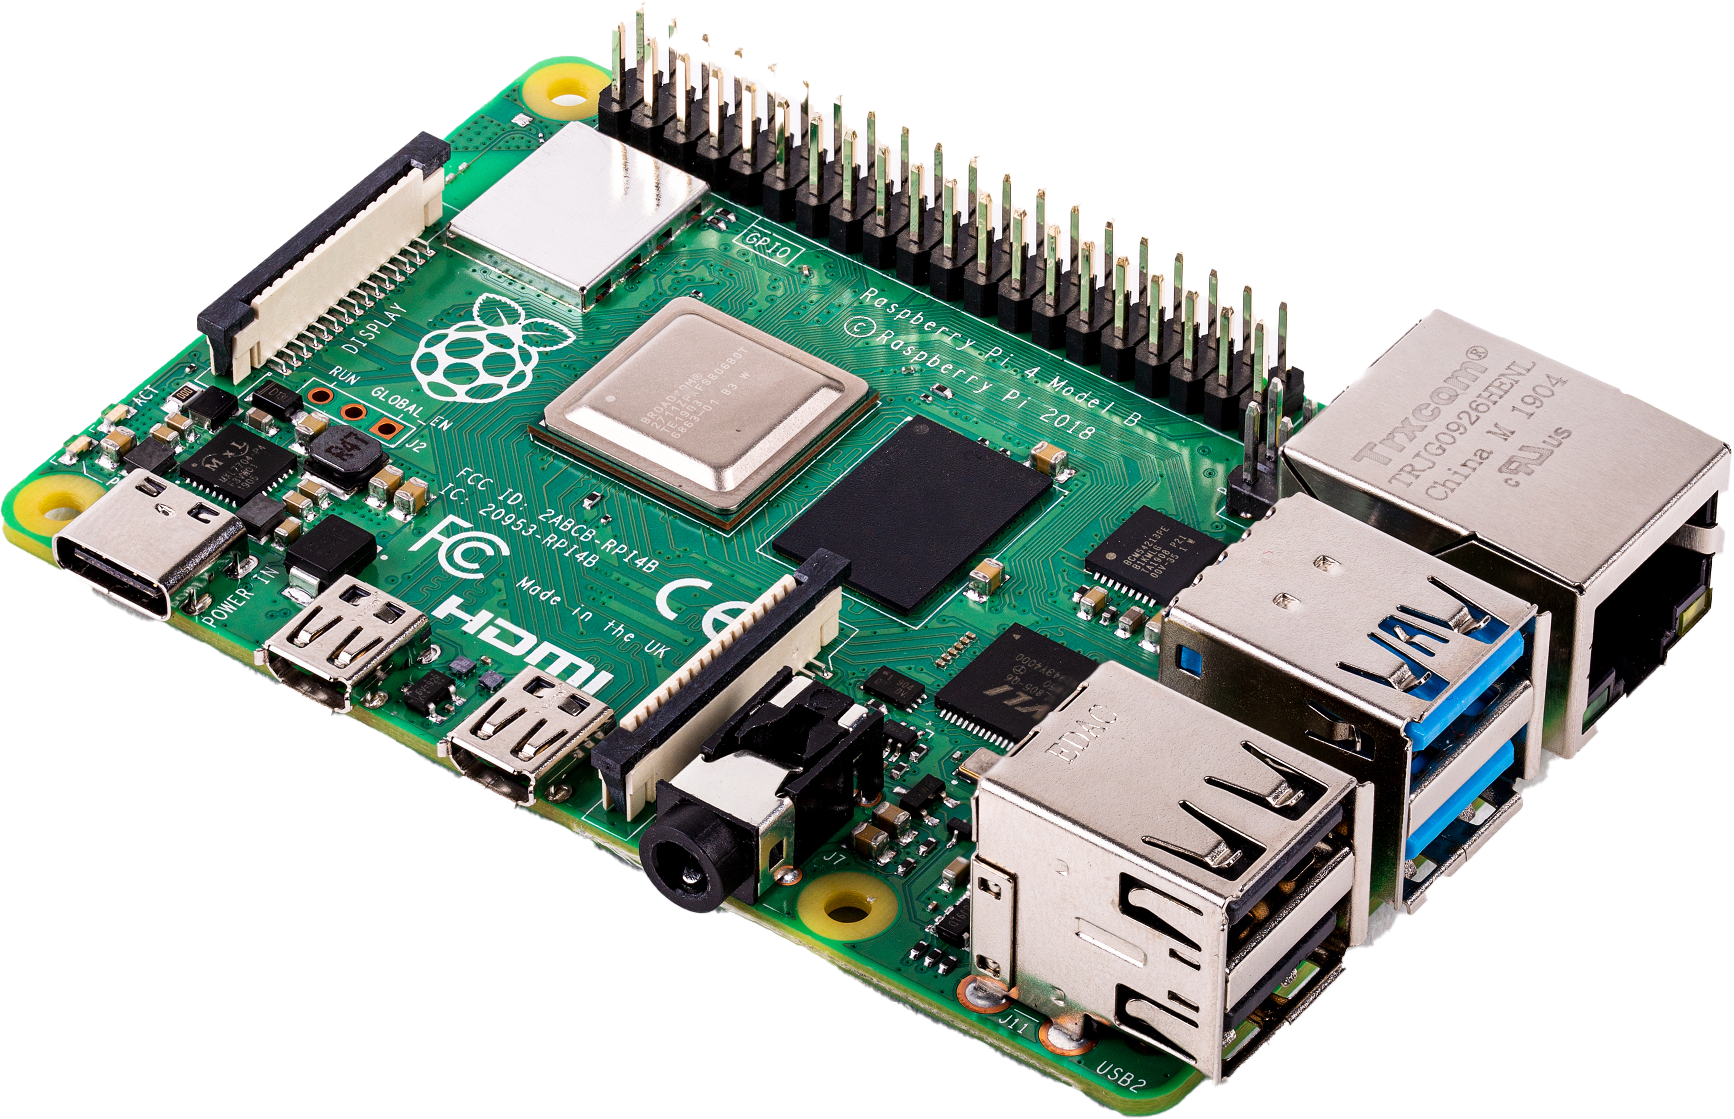
- One Raspberry Pi 4 Model B single-board computer with accessories including a microSD card that’s 32GB or larger. Any CanaKit Raspberry Pi 4 Starter Kit will work. This is the target host device for TVB integration.
- One USB-A thumb drive (64GB or larger), for example SanDisk 64GB Ultra USB 3.0 Flash Drive - SDCZ48-064G-UAM46. We will program the USB drive, and use it to boot the Raspberry Pi into a “utility” OS to prepare the secure element and the microSD card for TVB integration.
-
One OPTIGA Trust M V3 shield board. We recommend TRUST M SHIELD
SP006068634, which can be purchased from Mouser. This
is the secure element for TVB integration.
An alternative choice is Adafruit Infineon Trust M Breakout Board - STEMMA QT / Qwiic. Note that it is a Trust M V1 board, and is thus less feature rich than V3, but it works equally well for TVB.
- One SparkFun Qwiic or Stemma QT SHIM for Raspberry Pi / SBC. This is a SHIM for an easy, solderless Raspberry Pi/Trust M connection.
- One STEMMA QT / Qwiic JST SH 4-Pin Cable - 50mm Long. This cable is for the Raspberry Pi/Trust M connection.
- One desktop/laptop PC running Linux, MacOS X, or Windows, for programming the USB drive, controlling the Raspberry Pi, and observing its logs.
- One USB to TTL Serial Cable - Debug / Console Cable for Raspberry Pi. If your PC runs Windows or MacOS X, you need to install the associated PL2303 and CP2102 drivers by following instructions in the preceding link. The cable is used to connect the PC to the Raspberry Pi’s UART port, to observe boot logs.
TVB Demo Preparation
Connect Raspberry Pi 4 (RPi-4) and Trust M over I2C
Plug the SHIM to the RPi-4’s I2C bus, and connect it to the Trust M mikroBUS shield board using the 4-pin cable, as illustrated below.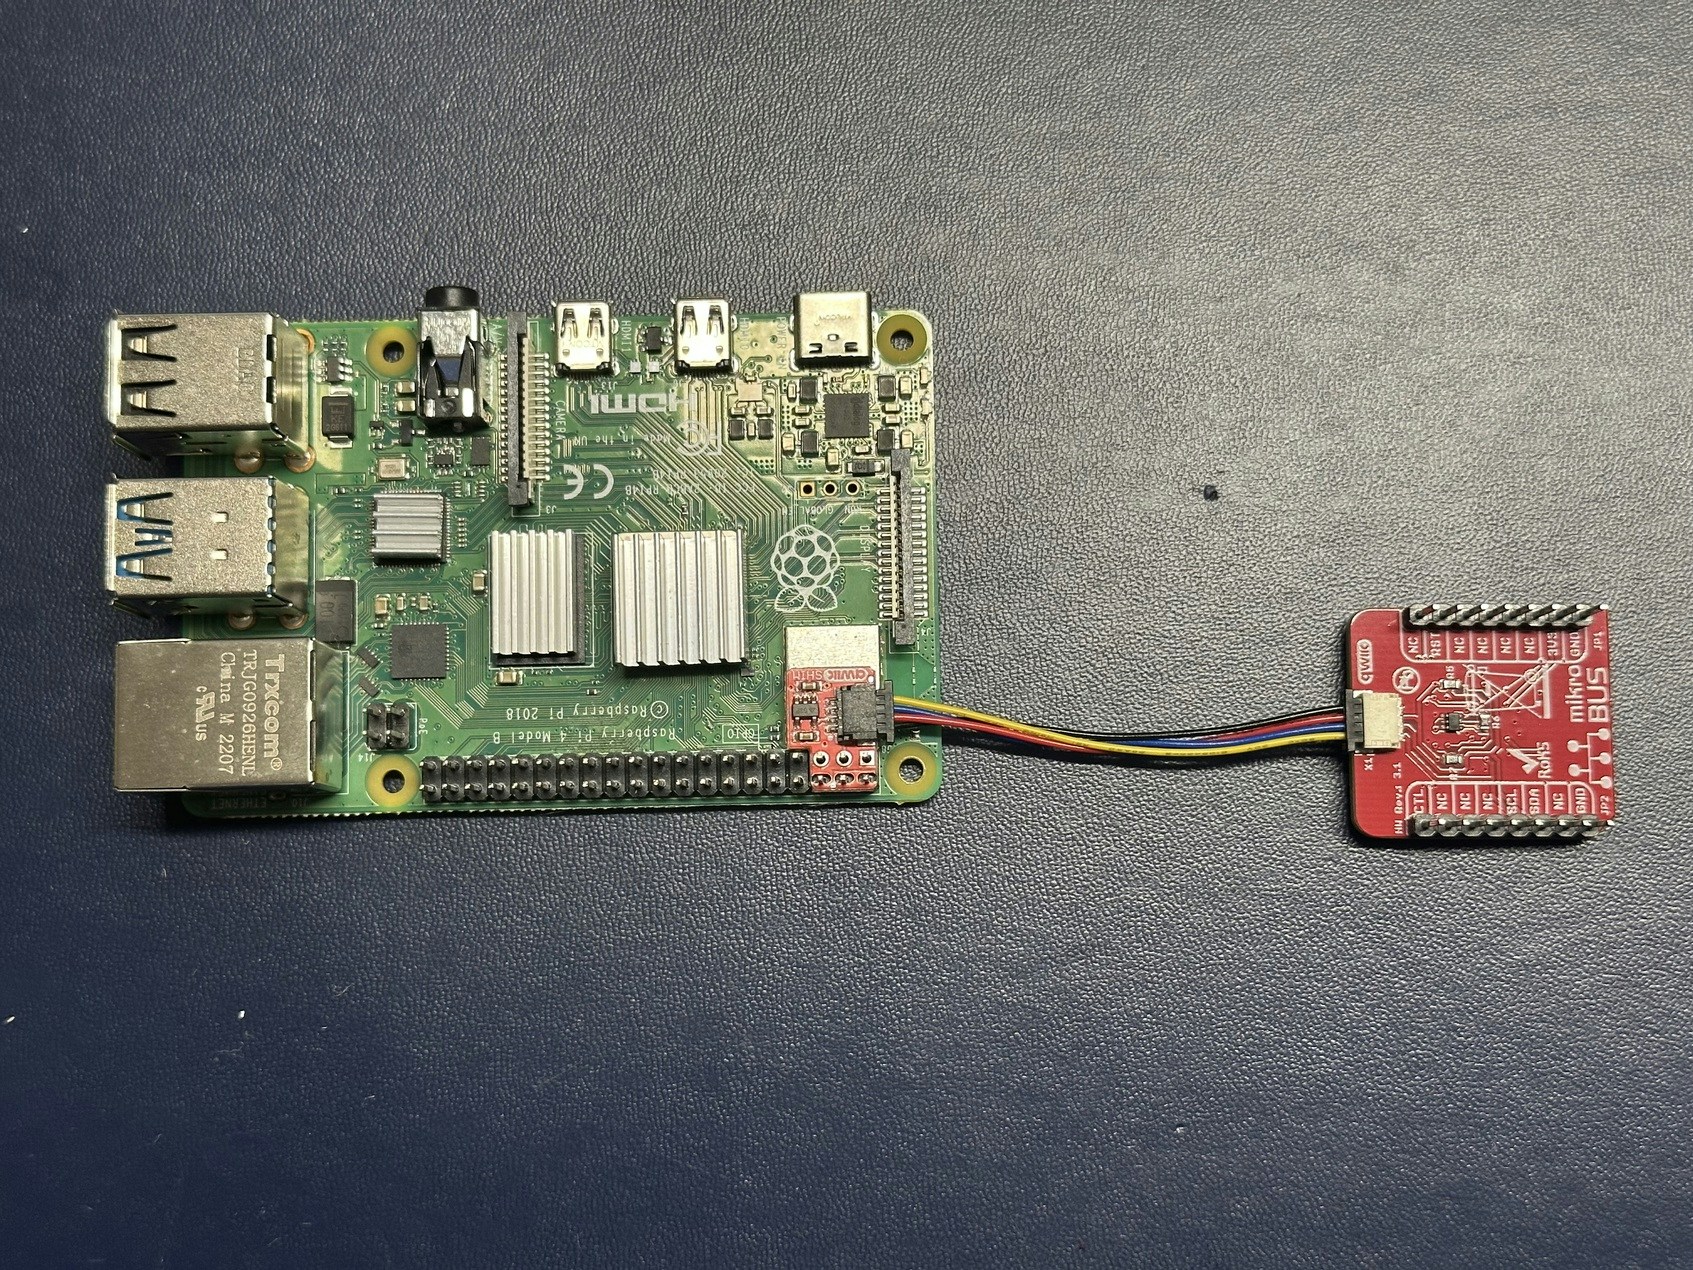
Connect PC and RPi-4 over Serial Port
Connect the RPi-4’s Pin 14 (GND), Pin 8 (GPIO 14 / TXD), and Pin 10 (GPIO 15 / RXD) to the Ground (black), RXD (white), and TXD (green) of the USB To TTL serial cable, respectively. Plug the other end of the cable (USB-A male) to the PC.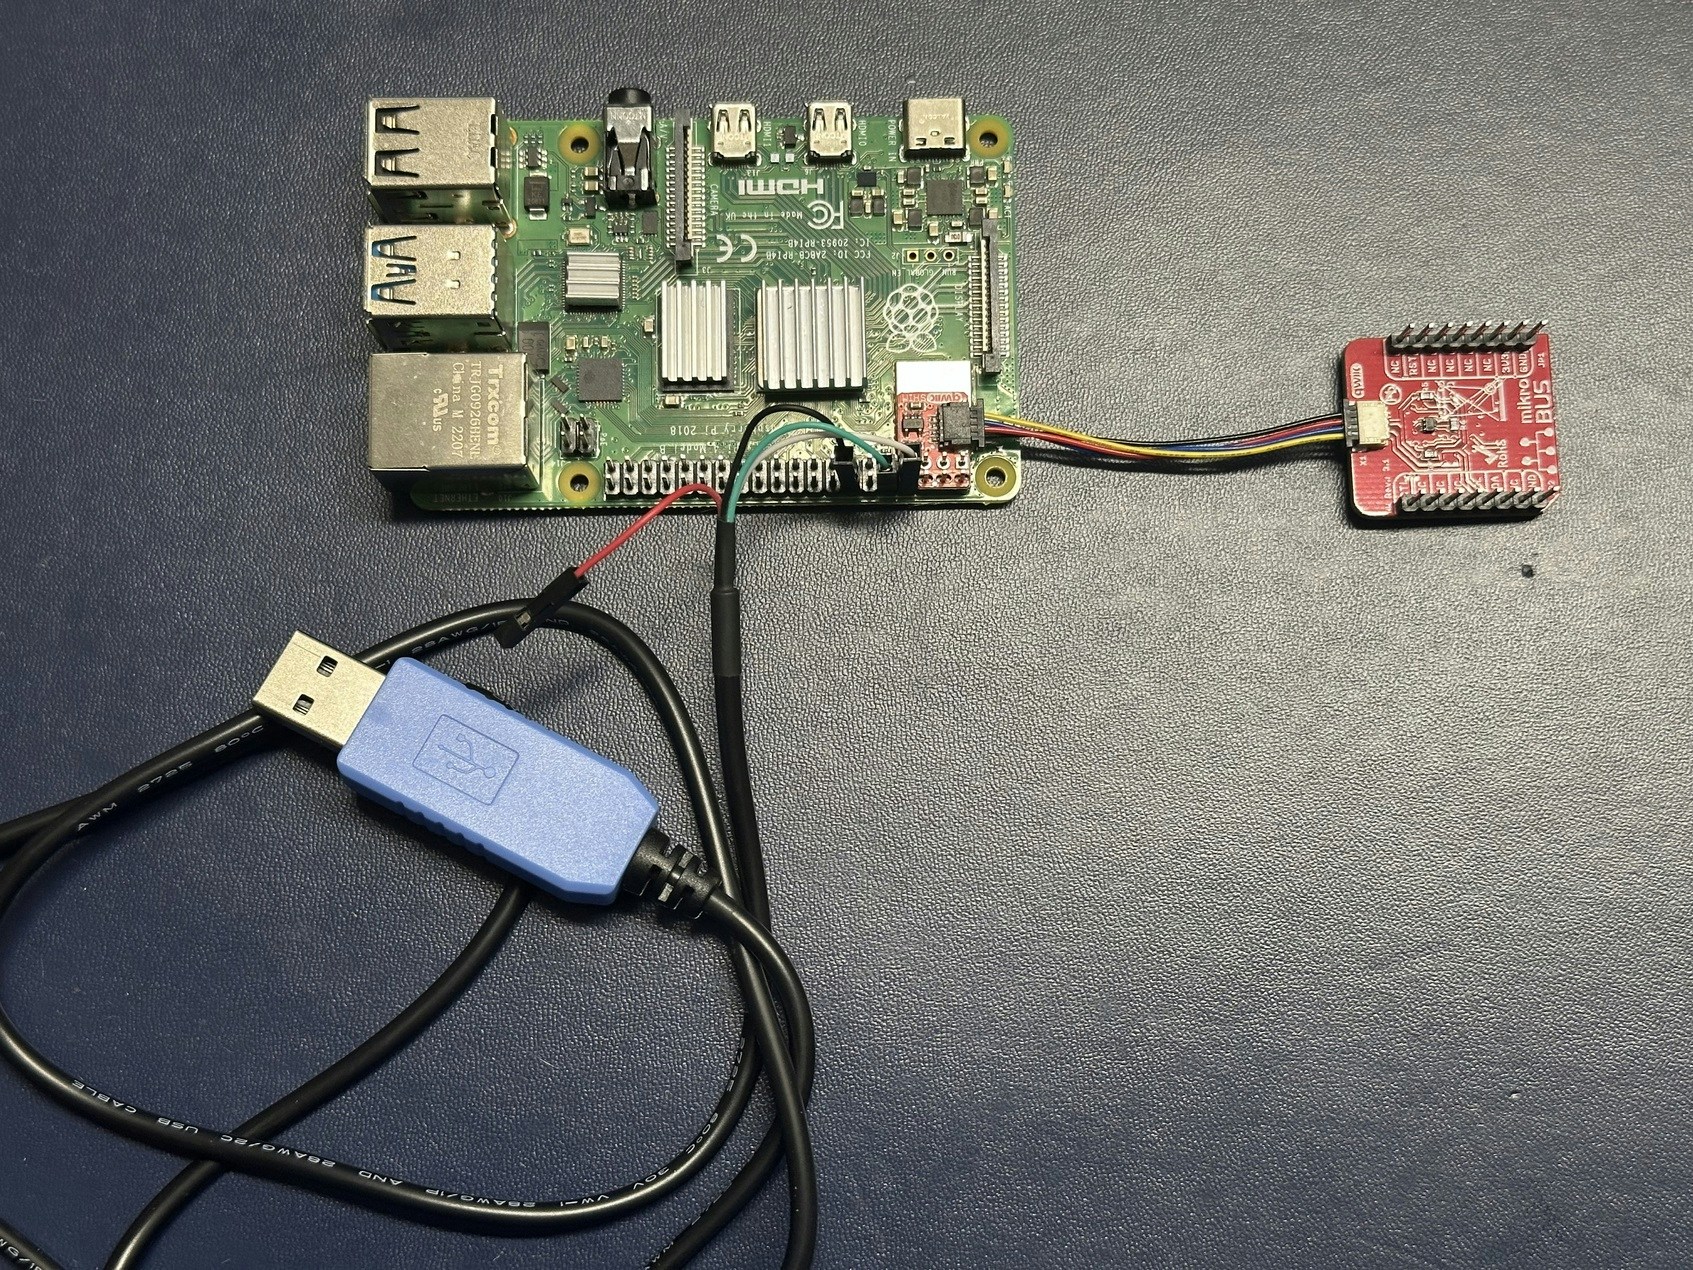
Prepare USB Drive on PC
On the desktop/laptop PC, install the Raspberry Pi Imager application, and use it to install a utility operating system to the USB drive. Insert the USB drive to the PC. In Imager’s UI, select “Raspberry Pi 4” as the device, “Raspberry Pi OS (other) > Raspberry Pi OS Lite (64-bit)” as the operating system, and the USB drive as the storage. In the “OS customisation” step: set the host name (in this guide our host name will be “rpi4-util”), username and password; configure wireless LAN credential so that the RPi-4 can automatically connect to WiFi; and enable SSH to allow a headless connection setup. Program the USB drive with the selected OS with the custom setting. Once the flashing process completes, remove the USB drive from the PC, and insert it to the RPi-4’s USB-A port. Make sure no microSD card is inserted into the RPi-4.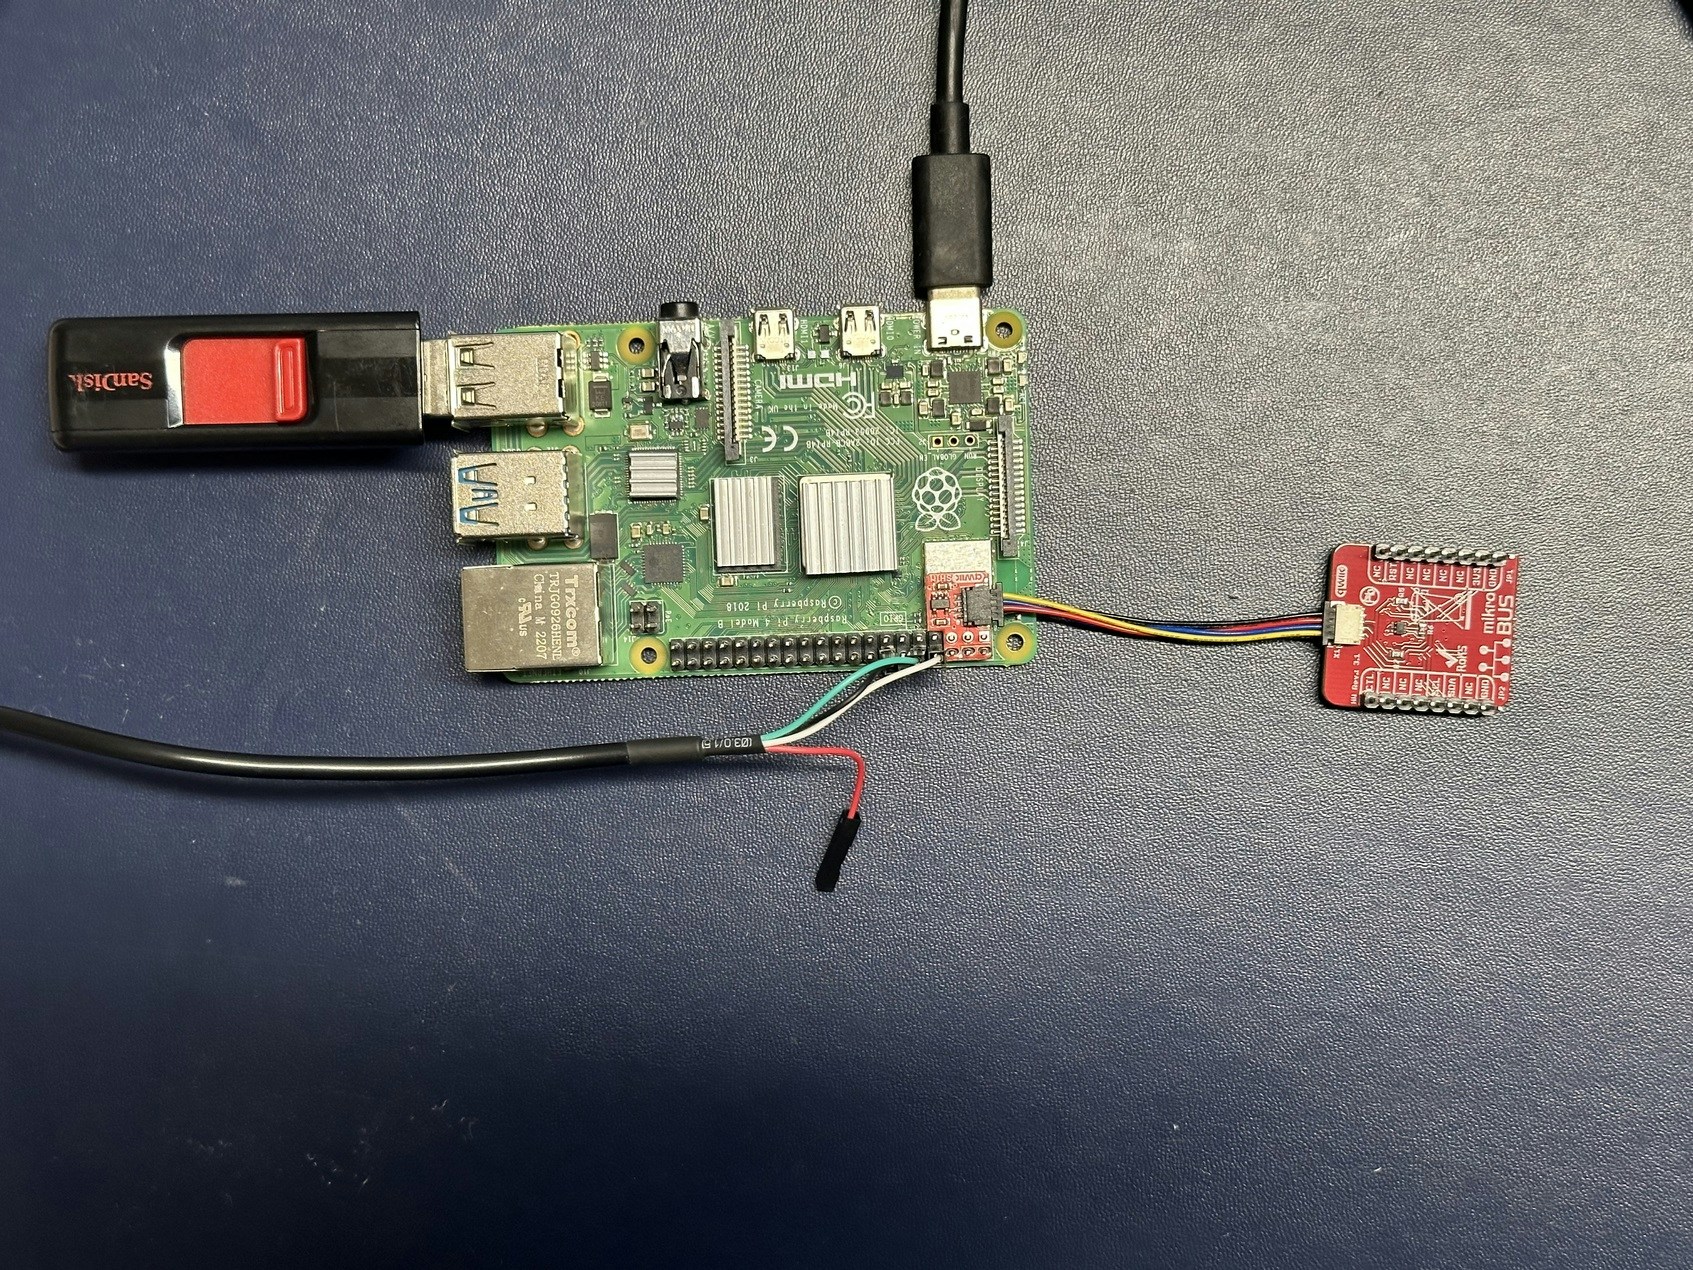
Boot into Utility OS and Install Necessary Software
Power on the Raspberry Pi 4 device, and wait a couple of minutes for the OS to boot up. Find the IP address of the device using a network scanning tool such as Nmap. SSH onto the RPi-4:ssh <username>@<rpi4-ip-addr>.
Commands in the rest of this section are executed in the SSH shell on the RPi-4.
Alternatively, one can also login to the RPi-4 using a keyboard and a monitor,
or through a serial console. In this tutorial, we will use the SSH shell to send
commands to the RPi-4.
-
Keep the Raspberry Pi OS and packages up to date, and get the latest EEPROM
firmware.
-
Run
sudo raspi-configto enable I2C and Serial Port interfaces. These options are under “Interface Options” in the main menu. Click on “Finish” to save the configuration changes, and reboot the RPi-4 for the changes to take effect.
-
After reboot, SSH onto the RPi-4 again. Install the OPTIGA Trust V1/V3 Linux
tools.
Test that the RPi-4 can communicate with the Trust M by running the
trustm_chipinfocommand. A sample output a successful test is shown below.
Prepare microSD Card on RPi-4 Running Utility OS
We will now flash a Thistle provided embedded Linux image for RPi-4 on the microSD card. This image will be used to demonstrate TVB. Note that we could use a stock Raspberry Pi OS image for the TVB demo, too. However, Raspberry Pi OS is too feature rich to harden, and hence is unlikely to be a good platform to implement TVB in production. The Thistle image is more lightweight and thus have a smaller attack surface, closer to a production use case. While the utility OS is up and running, insert the microSD card to the card slot. This microSD card should appears as a block device/dev/mmcblk0 (one can
confirm it by looking at the tail of the output of sudo dmesg command).
Sign Linux Kernel Image in Thistle Control Center
All the steps in this section are performed on a PC terminal, except for those commands starting with thethistle@rpi4-util:~ $ prompt, which are executed on
the RPi-4.
-
Power on the RPi-4 again. After the utility OS boots up, copy the previously
saved Linux kernel image to the PC. Copying between the utility OS and the PC
can be done with
scpor a USB thumb drive.- with SCP
- with USB thumb drive
- If you have not used Thistle before, first sign up with Thistle. Then sign in to the Thistle Control Center, and create a project.
-
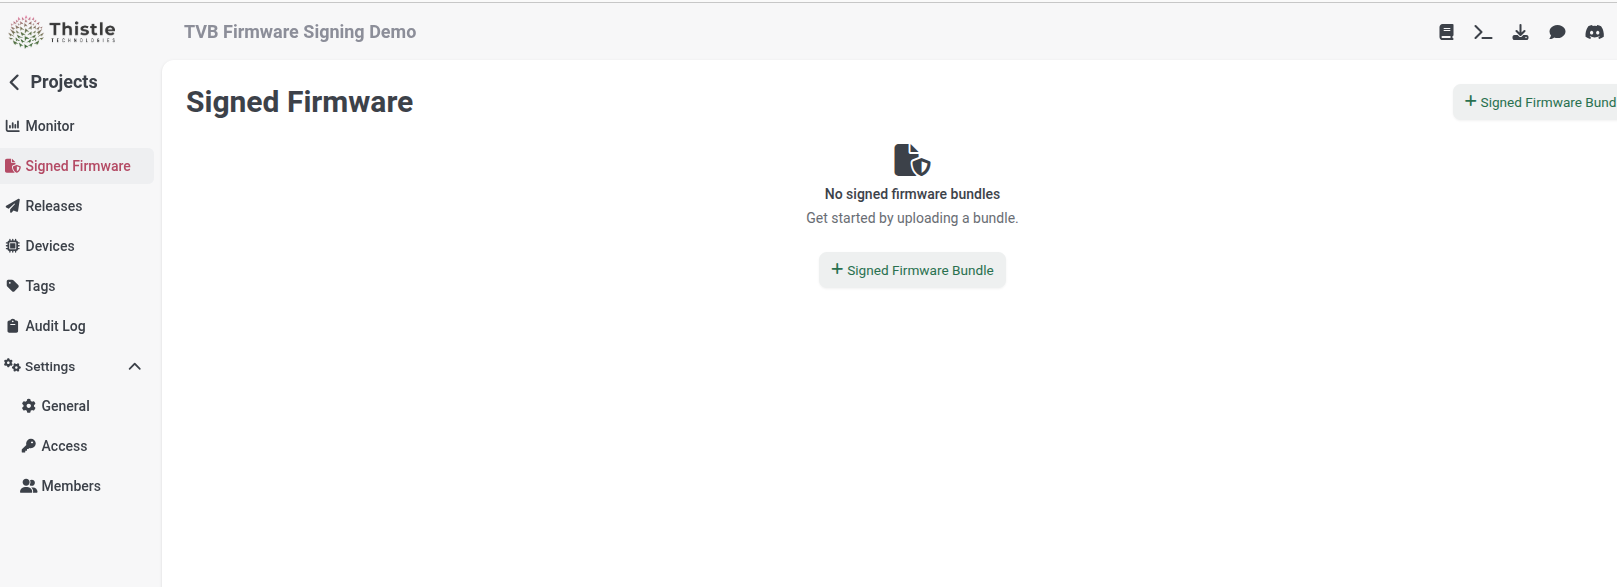
In the project you just created, go to the “Signed Firmware” view, and click
the “+Signed Firmware Bundle” button to create a new signed firmware bundle.
-
A TVB signing key pair is generated when the first signed TVB firmware bundle
is created. Choose a value you like for
Name(e.g., “v1.0.0”). Select “Raspberry Pi + OPTIGA Trust M” forHardware Type, and “Linux Kernel Verified Boot” forFirmware Type. Pick the earlier kernel image filekernelas theKernel Image. Click on the “Create” button to get it signed.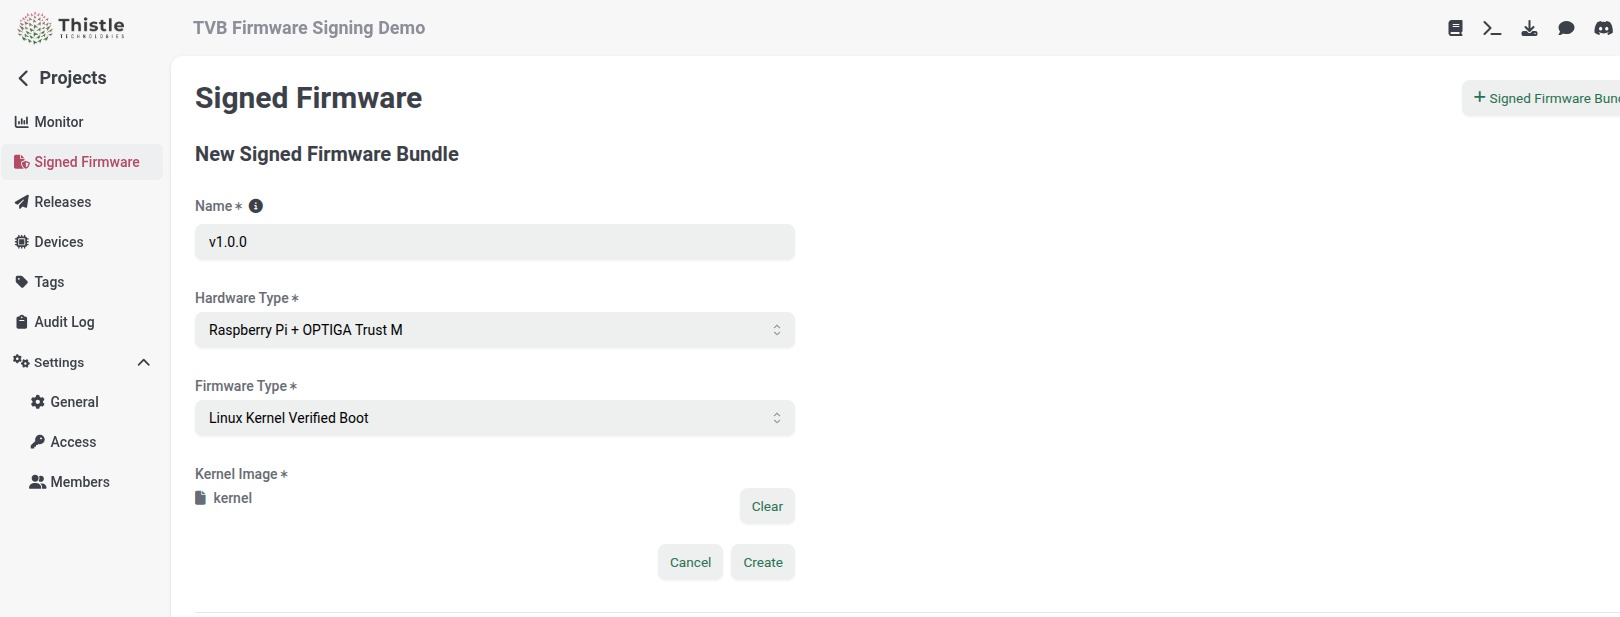
-
When the kernel image is signed successfully, a signed firmware bundle should
appear in “Signed Firmware”. Click through and download the “Tvb Kernel
Signature” file (
kernel.sig_<timestamp>) to PC.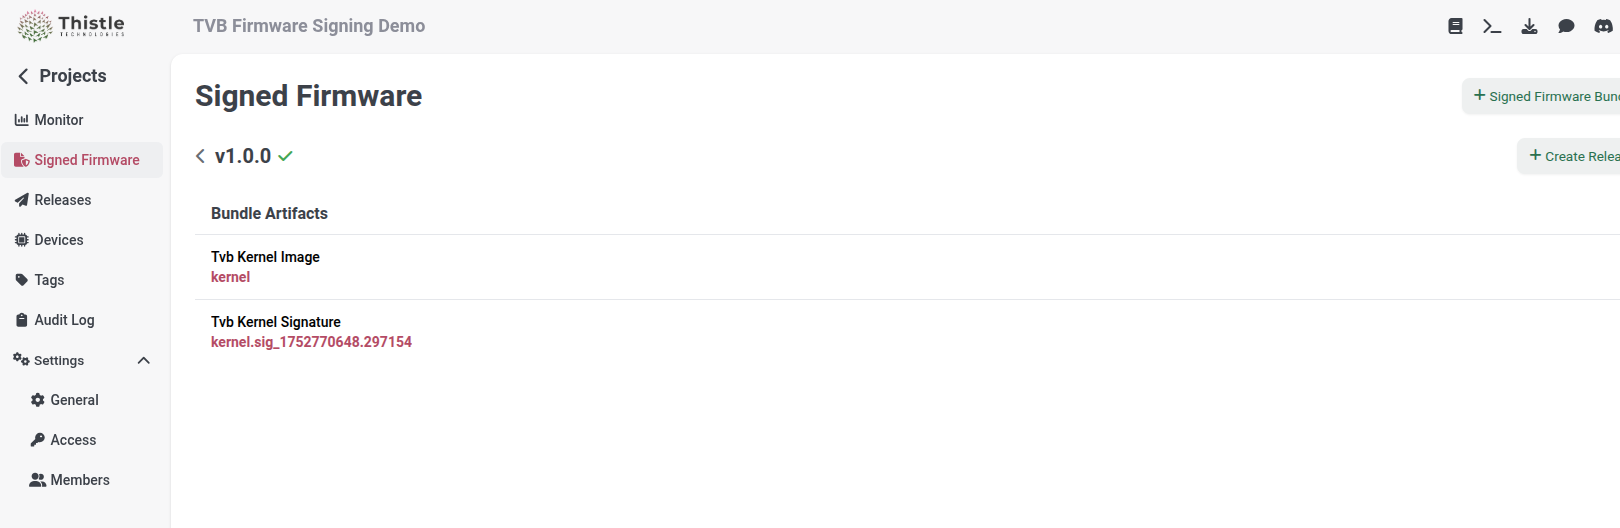
-
Copy the kernel signature file to the RPi-4.
- with SCP
- with USB thumb drive
Copy Kernel Signature to microSD Card
Re-insert the microSD card to the RPi-4 (which is running the utility OS). SSH onto the RPi-4, and add the kernel signature file to the microSD card.Provision TVB Public Key to Trust M on RPi-4 Running Utility OS
When the first signed TVB firmware bundle is created, a Cloud-KMS-backed key pair is also generated. Go to “Settings > Access”. Under the “Signed Firmware” section, the TVB public verification key appears. You can now copy the public key to your clipboard.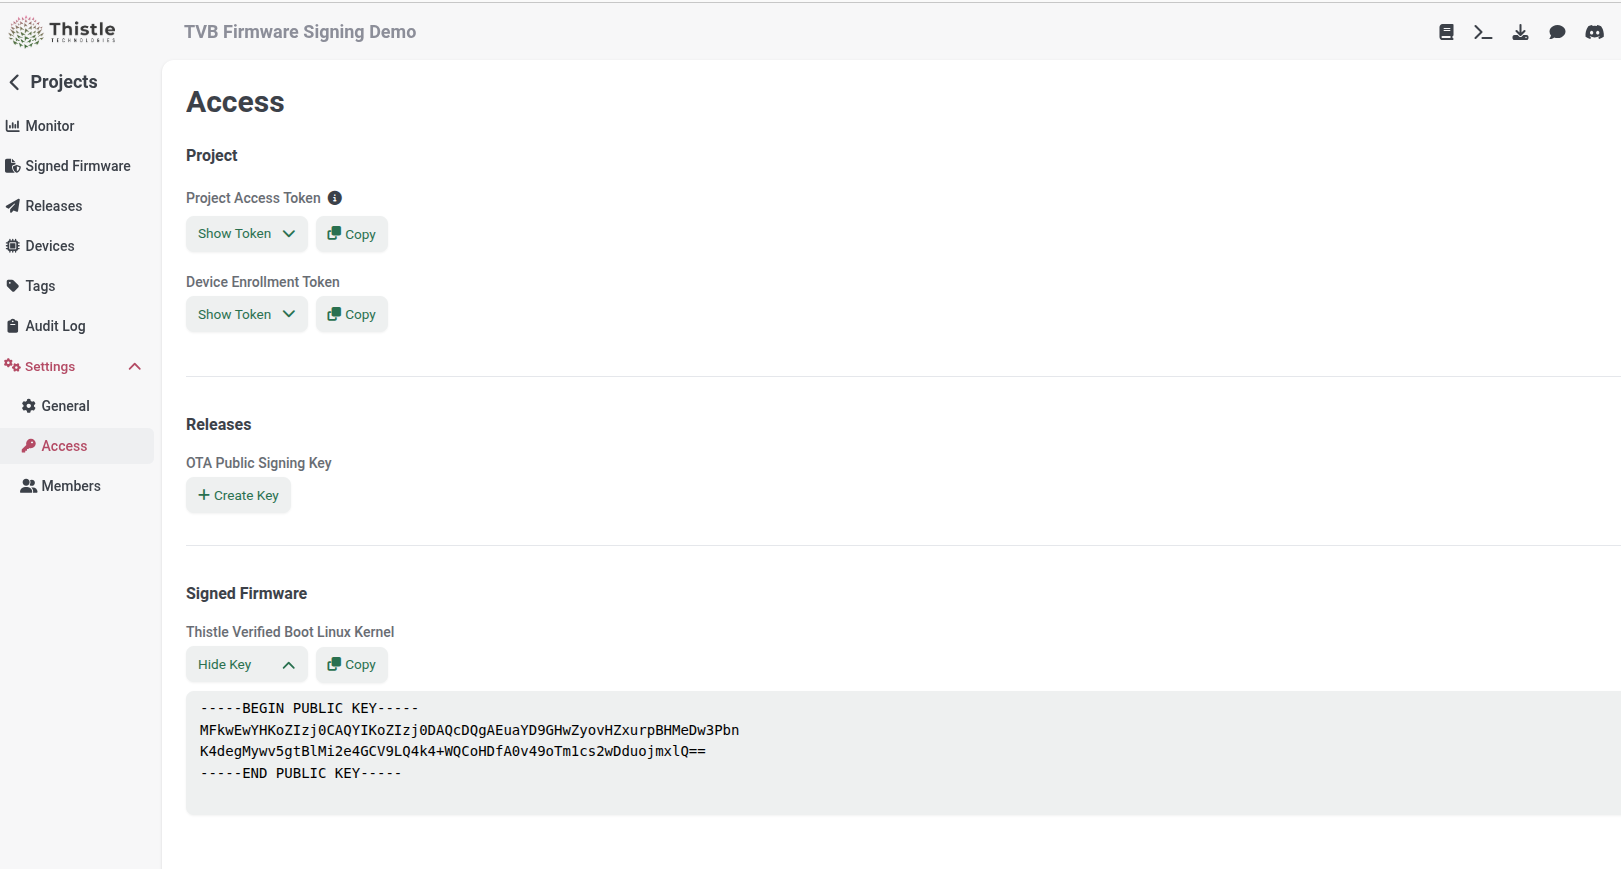
Thistle Verified Boot Demo
With all the preparation work, the TVB demo is actually a boring one.The Happy Path
Power on the RPi-4, and watch the serial port output on a PC terminal. You should be able to see the following lines in the U-Boot boot log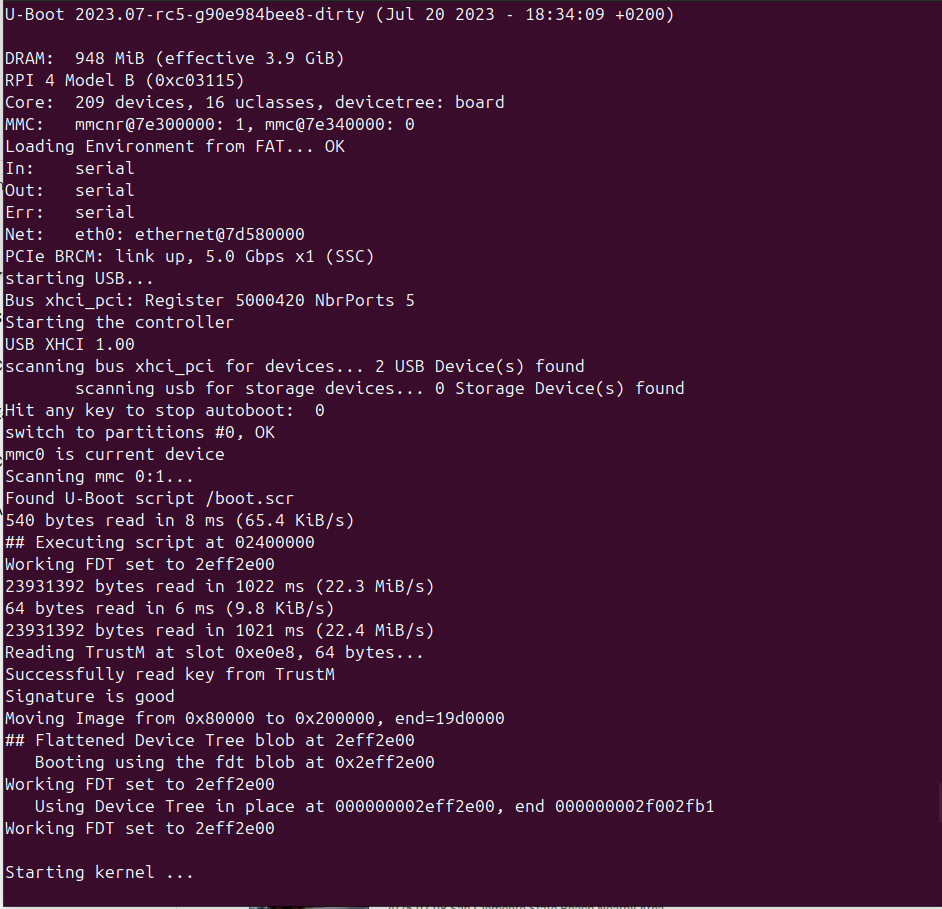
The username for this image is
a and the password is also a.Boot with a Tampered Kernel
If you change the content of thekernel file in the boot partition of the
microSD card (you can do this using the utility OS on the USB drive), booting
the RPi-4 from the microSD card next time should cause a TVB boot failure and a
rebooting loop, and hence the tampered kernel won’t boot. The following
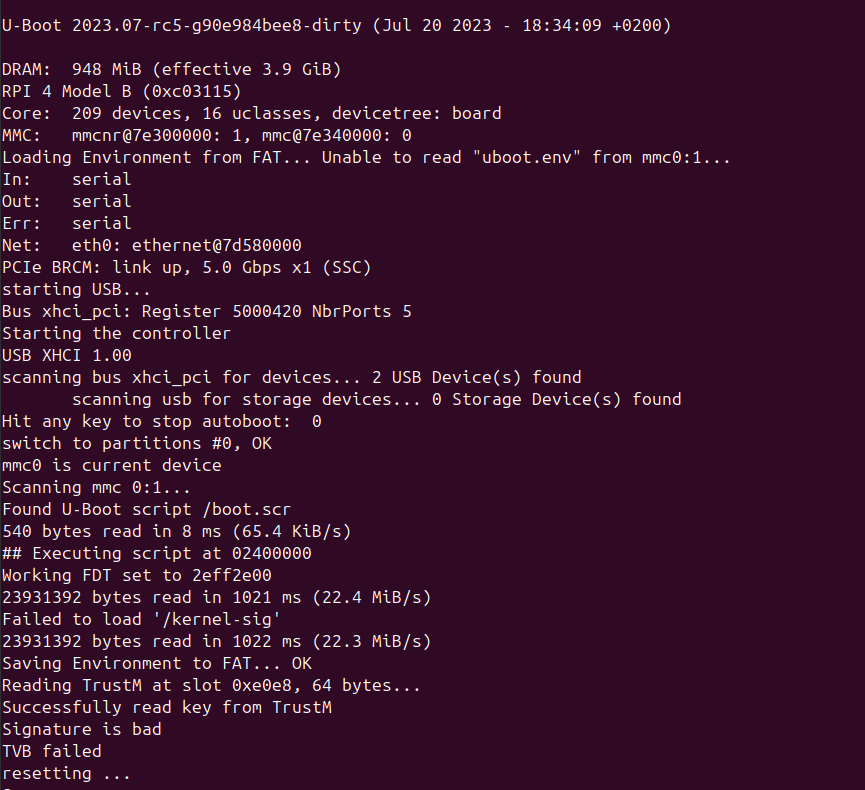
screenshot shows the U-Boot boot log when the authentic kernel image kernel is
replaced with a file of 1MB zero bytes.
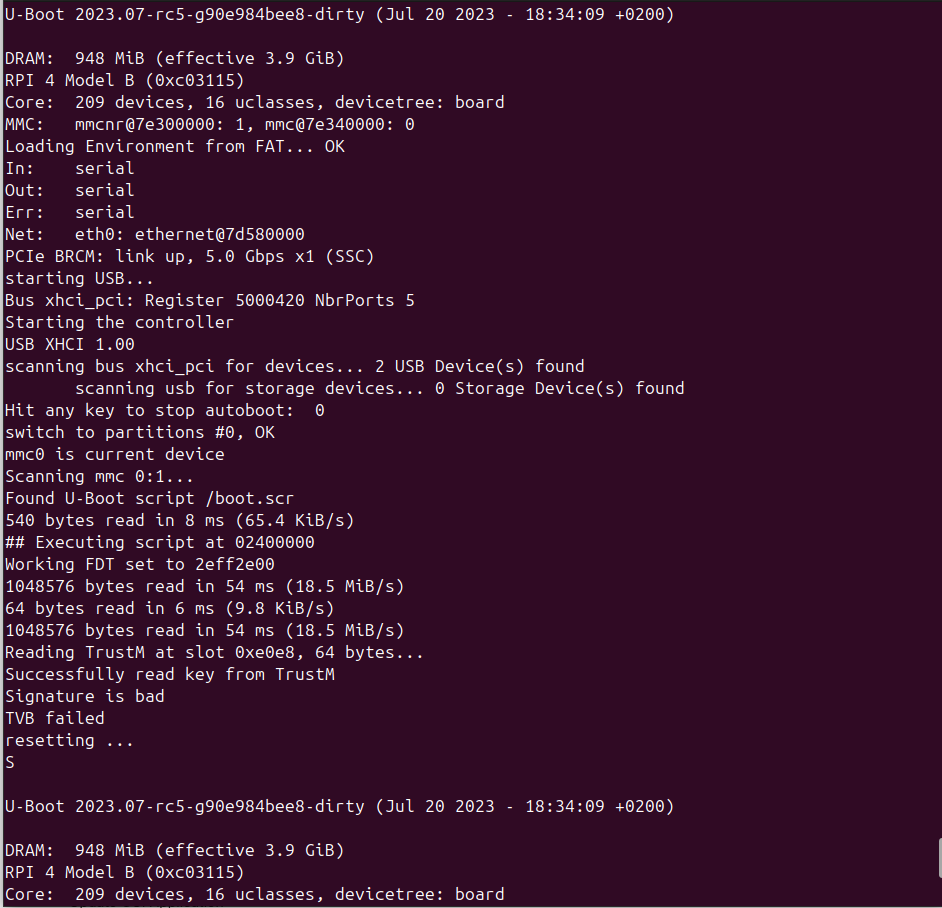
One can use the following command to create a tampered “kernel image” filled
with 1MB zero bytes on the RPi-4 running the utility OSCopy Power off the RPi-4, remove the utility OS USB drive, and power on the RPi-4
again so it will try booting from the microSD card to observe the boot failure.
kernel.bad to the boot partition of the microSD card, and rename it to
kernel, using the following commands