

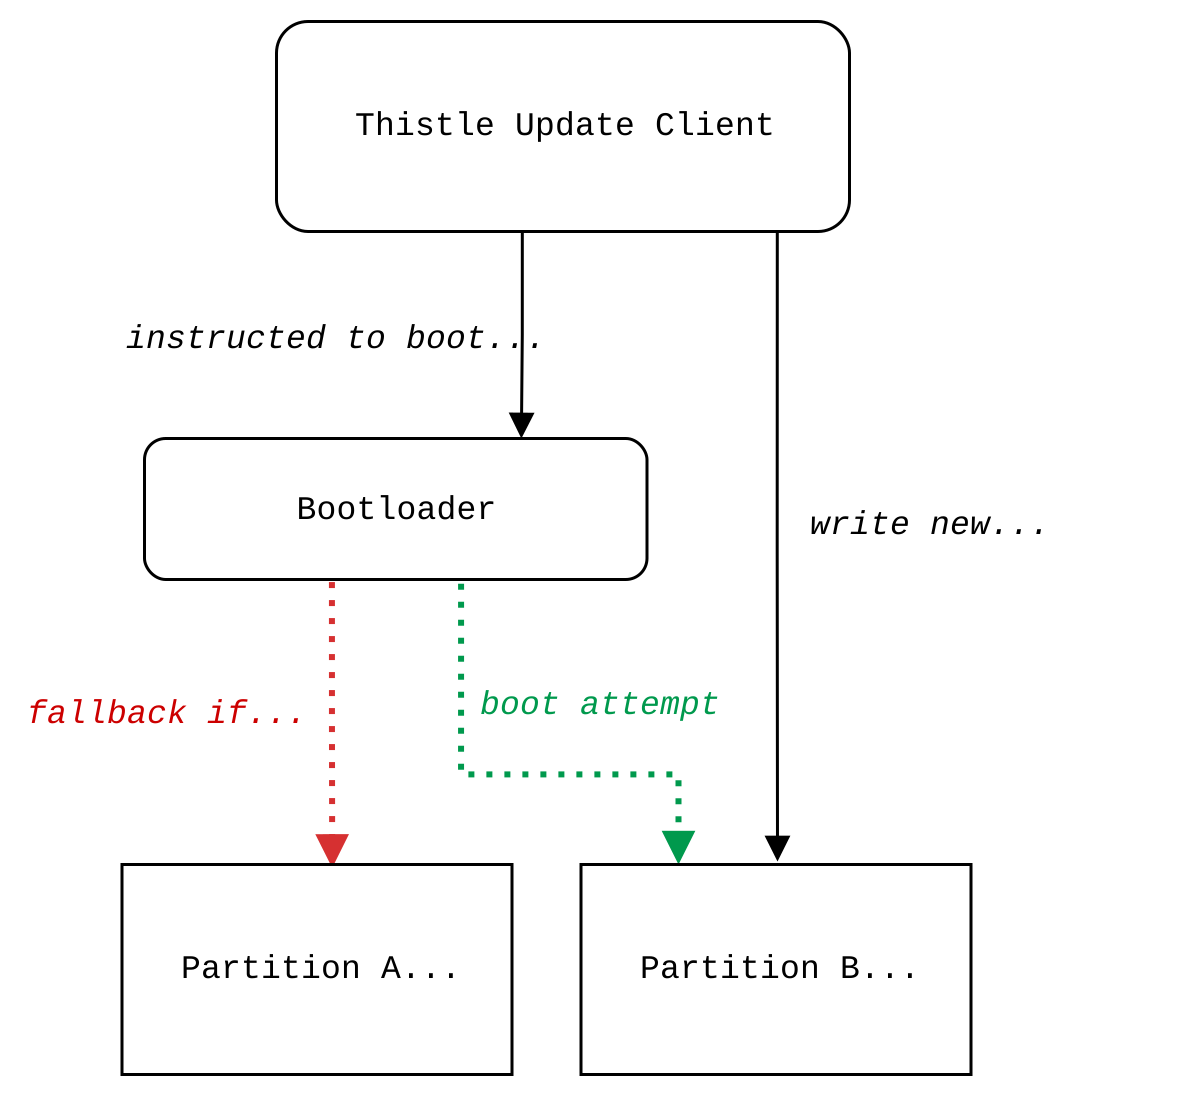
Tools Needed for This Tutorial
Hardware
- One Raspberry Pi 4 Model B single-board computer with accessories including a microSD card that’s 32GB or larger. Any CanaKit Raspberry Pi 4 Starter Kit will work. This is the target host device for OTA A/B update integration.
- One USB-A thumb drive (64GB or larger), for example SanDisk 64GB Ultra USB 3.0 Flash Drive - SDCZ48-064G-UAM46. We will program the USB drive, and use it to boot the Raspberry Pi into a “utility” OS to prepare the microSD card for OTA A/B update integration.
- One desktop/laptop PC running Linux, MacOS X, or Windows, for publishing OTA updates, programming the USB drive, controlling the Raspberry Pi, and observing its logs.
- One USB to TTL Serial Cable - Debug / Console Cable for Raspberry Pi. If your PC runs Windows or MacOS X, you need to install the associated PL2303 and CP2102 drivers by following instructions in the preceding link. The cable is used to connect the PC to the Raspberry Pi’s UART port, to observe boot logs.
Software
- The Thistle Release Helper to help packaging your updates
- A project access token from the Thistle App
- The official Raspberry Pi OS Lite image (May 13, 2025): download
- Thistle provided sample update disk image
OTA A/B Update Demo Preparation
Connect PC and RPi-4 over Serial Port
Connect the RPi-4’s Pin 6 (GND), Pin 8 (GPIO 14 / TXD), and Pin 10 (GPIO 15 / RXD) to the Ground (black), RXD (white), and TXD (green) of the USB To TTL serial cable, respectively. Plug the other end of the cable (USB-A male) to the PC.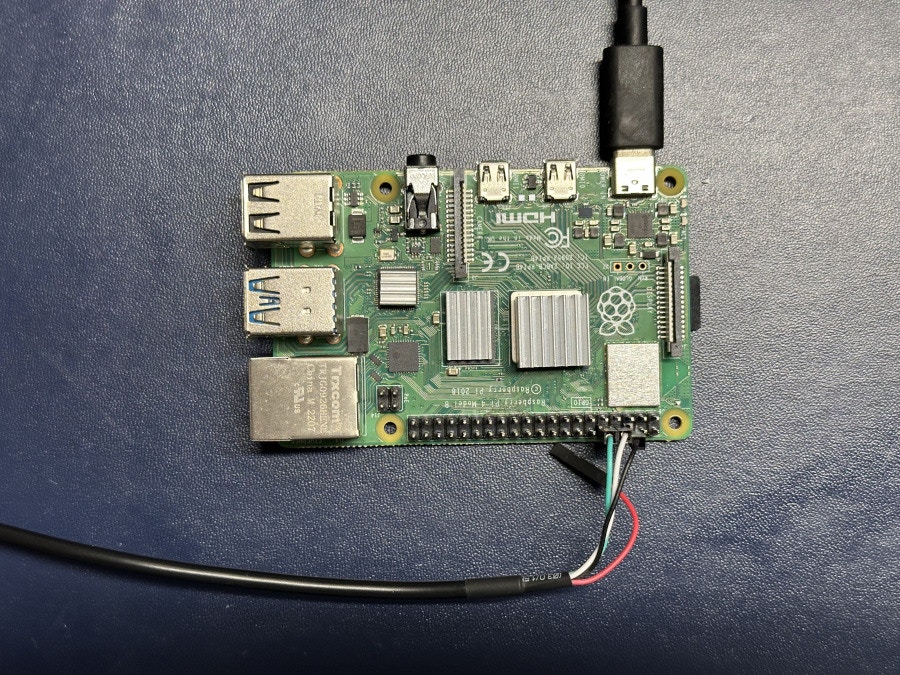
Prepare USB Drive and microSD Card on PC
On the desktop/laptop PC, install the Raspberry Pi Imager application, and use it to install a utility operating system to the USB drive. Insert the USB drive to the PC. In Imager’s UI, select “Raspberry Pi 4” as the device, “Raspberry Pi OS (other) > Raspberry Pi OS Lite (64-bit)” as the operating system (for this guide we use the May 13, 2025 version), and the USB drive as the storage. In the “OS customisation” step: set the host name (in this guide our host name will be “rpi4-util”), username and password; configure wireless LAN credential so that the RPi-4 can automatically connect to WiFi; and enable SSH to allow a headless connection setup. Program the USB drive with the selected OS with the custom setting. Remove the USB drive from PC. Insert the microSD card to the PC. Repeat the above process to write the Raspberry Pi OS with similar settings to the microSD card. We will use hostname “ota-demo” in this guide. Remove the microSD card from PC. The microSD card will be used for the OTA A/B update demonstration. Once both the USB drive and the microSD card are programmed, insert the USB drive to the RPi-4’s USB-A port. Make sure the microSD card is not inserted into the RPi-4.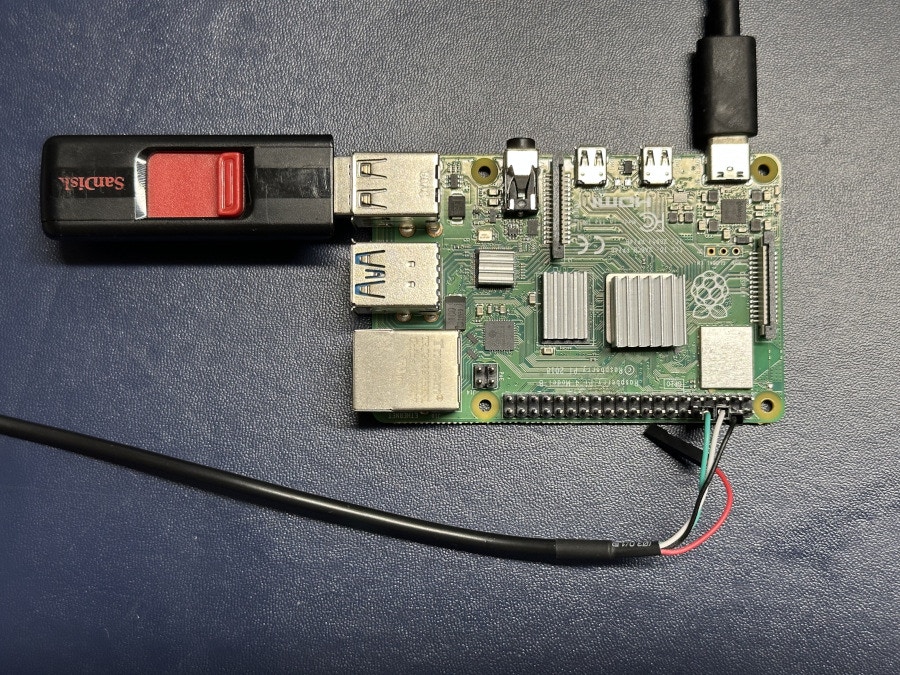
Boot into Utility OS and Install Necessary Software
Power on the Raspberry Pi 4 device, and wait a couple of minutes for the OS to boot up. Find the IP address of the device using a network scanning tool such as Nmap. SSH onto the RPi-4:ssh <username>@<rpi4-ip-addr>.
Commands in the rest of this section are executed in the SSH shell on the RPi-4.
-
Keep the Raspberry Pi OS and packages up to date, and get the latest EEPROM
firmware.
Because of issues on the earlier versions of the Raspberry Pi 4, one needs to run on the latest EEPROM firmware.
-
Run
sudo raspi-configto enable the Serial Port interfaces. The option is under “Interface Options” in the main menu. Click on “Finish” to save the configuration changes, and reboot the RPi-4 for the changes to take effect.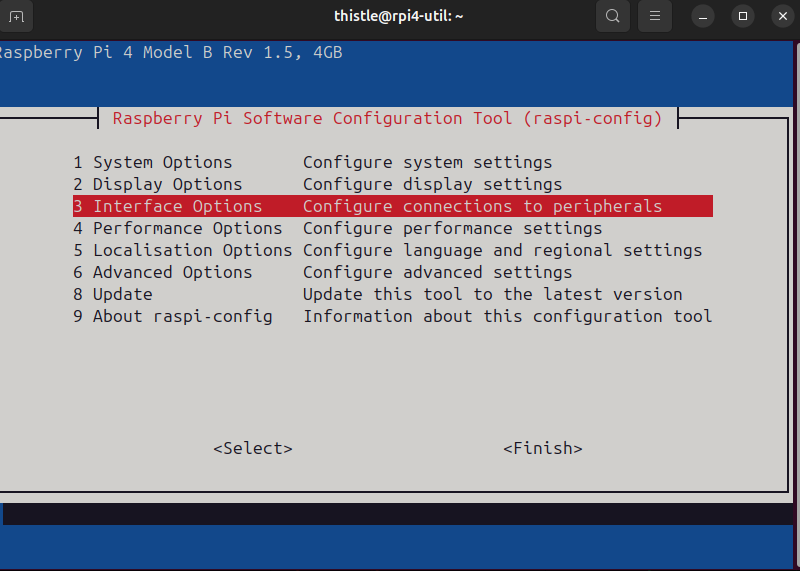
-
Insert the microSD card after the utility OS has booted. We will customize
the stock Raspberry Pi OS image to make it ready for the A/B update demo.
On the Raspberry Pi in the utility OS, the microSD card should show up as
/dev/mmcblk0. It contains two partitions: a boot partitionmmcblk0p1, and a rootfs partitionmmcblk0p2.For A/B update to work, we need a third partition for the alternative rootfs, and will create it usingfdiskon the utility OS interactively.In thefdiskmenu, first show the current partition table. Take note on the end sector number for/dev/mmcblk0p2- we will create a new partition right after it.Now create a new primary partition/dev/mmcblk0p3, as follows. Set the first sector value the last sector number of/dev/mmcblk0p2plus 1 (5390336 in this example), and use the default value for all other choices.Check the block device information again to make sure the new partition has been created. -
We also need to customize the file system table (the
fstabfile) of the microSD card’s default rootfs, and add thetucbinary to the rootfs.-
Mount the default rootfs partition.
-
Modify
/etc/fstabFind the lineChange the second column from/boot/firmwareto/boot. Save and exit. -
Add the latest TUC binary to
/usr/bin/ -
Sync the changes made to the microSD card, and umount.
-
For convenience of the demo, enable UART in the demo OS by modifying
config.txtin the boot partition.Addenable_uart=1to the last line ofconfig.txt. Save the change, and power off the Raspberry Pi.
-
Mount the default rootfs partition.
OTA A/B Update Demo
When the RPi-4 is powered off, unplug the USB drive, and leave the microSD card inserted. On PC, connect to the serial port so you can start watching boot logs.Create an update bundle on PC
For the purpose of this example, we will release the alternative rootfs image as an update. This image will be deployed with the Release Helper, and will be installed on the target automatically by the Update Client. First download the rootfs update image to PC.The command line option
--signing-method="remote" uses a Thistle-managed,
Cloud
KMS-backed
ECDSA-P256 key to sign OTA update bundles. For other signing methods supported
by TRH, please refer to our blog post OTA Bundle Signing in Production with
Thistle Release
Helper.Amend device configuration for bootloader configuration
To support A/B root filesystem updates with the Thistle Update Client, it is required to amend the configuration, and add the two partitions used for A/B updates, as well as the two scripts used by the Update Client to handle bootloader interaction. Refer to the Bootloader Integration page for more information on these scripts.config.json onto the Raspberry Pi, this can be done
using scp or using a USB key. This is necessary so that we can run the update
client on the Raspberry Pi with the appropriate configuration. Under normal
circumstances, this operation will be performed automatically during e.g. the
image personalization step of a deploy pipeline.
We are now ready to run the client on the Raspberry Pi, and observe our first update cycle.
Test deployed release
We can now test our deployed release. Note that as the assets will be downloaded from the Thistle Backend Server, an internet connection is required.The default username and password for this alternative rootfs image are
thistle and raspberry, respectively.You just performed your first automated A/B update cycle 🎉 Have a look at the Thistle App,
your device can now be monitored directly there.
More options
This tutorial shows how to manually perform an update on the Raspberry Pi. This process can be automated to update a fleet of devices. In this regards, we support different enrollment setups, either based on Trust On First Use (TOFU), or only accepting pre-enrolled devices.- Support for pre & post install scripts
- Incremental updates via file updates
- OTA bundle signing using external signing tools